Model Context Protocol (MCP) finally gives AI models a way to access the business data needed to make them really useful at work. CData MCP Servers have the depth and performance to make sure AI has access to all of the answers.
Try them now for free →


Prepare, Blend, and Analyze Xero Data in Alteryx Designer (Connect Cloud)
Build workflows to access live Xero data for self-service data analytics.
Alteryx is a software platform that allows people to work with data more easily. When paired with CData Connect Cloud, Alteryx provides instant access to Xero data from your data automation processes. This article demonstrates how to connect to Xero using Connect Cloud and work with Xero data in Alteryx.
CData Connect Cloud offers a dedicated SQL Server interface for Xero, facilitating data querying without the need for data replication to a native database. With built-in optimized data processing capabilities, CData Connect Cloud efficiently directs all supported SQL operations, including filters and JOINs, straight to Xero. This harnesses server-side processing to rapidly retrieve the desired Xero data.
About Xero Data Integration
Accessing and integrating live data from Xero has never been easier with CData. Customers rely on CData connectivity to:
- Connect to Xero Accounts and both US and Australian Payroll APIs.
- Read, write, update, and delete Xero objects like Customers, Transactions, Invoices, Sales Receipts and more.
- Use SQL stored procedures for actions like adding items to a cart, submitting orders, and downloading attachments.
- Work with accounting, payroll, file, fixed asset, and project data.
Customers regularly integrate their Xero data with preferred tools, like Tableau, Qlik Sense, or Excel, and integrate Xero data into their database or data warehouse.
Getting Started
Configure Xero Connectivity for Alteryx
Connectivity to Xero from Alteryx is made possible through CData Connect Cloud. To work with Xero data from Alteryx, we start by creating and configuring a Xero connection.
- Log into Connect Cloud, click Sources, and then click Add Connection
- Select "Xero" from the Add Connection panel
-
Xero uses OAuth to authenticate. Click "Sign in" to authenticate with Xero.
.")
-
Navigate to the Permissions tab in the Add Xero Connection page and update the User-based permissions.


Add a Personal Access Token
When connecting to Connect Cloud through the REST API, the OData API, or the Virtual SQL Server, a Personal Access Token (PAT) is used to authenticate the connection to Connect Cloud. It is best practice to create a separate PAT for each service to maintain granularity of access.
- Click on the Gear icon () at the top right of the Connect Cloud app to open the settings page.
- On the Settings page, go to the Access Tokens section and click Create PAT.
-
Give the PAT a name and click Create.

- The personal access token is only visible at creation, so be sure to copy it and store it securely for future use.
With the connection configured and a PAT generated, you are ready to connect to Xero data from Alteryx.
Connect to Xero from Alteryx
To establish a connection from Alteryx Desktop to the CData Connect Cloud Virtual SQL Server, follow these steps:
- Set up an account in Alteryx.
-
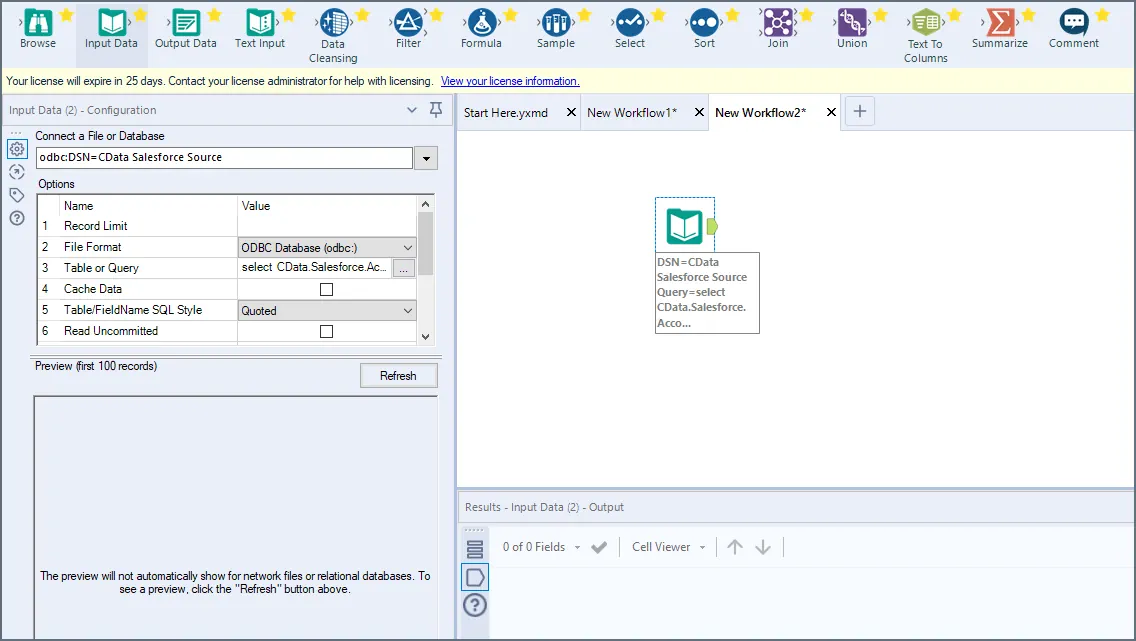
Drag and drop a new Input Data tool onto the workflow.
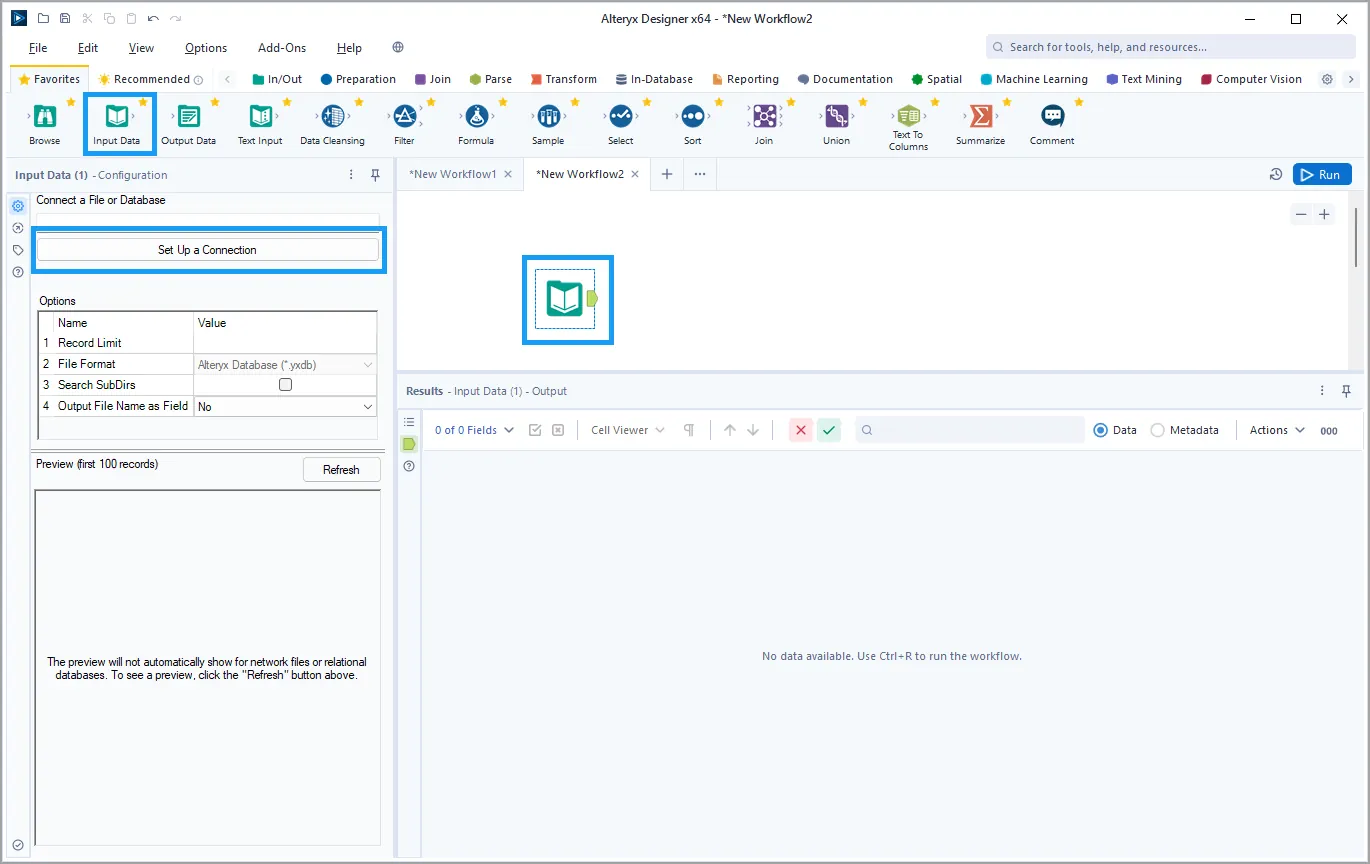
- While the Input Data tool is selected, click Set Up a Connection in the navigation panel. A Data connections dialog appears.
-
Click Data sources. Select Microsoft SQL Server > **Quick connect.

- In the Connection Manager dialog, click New.
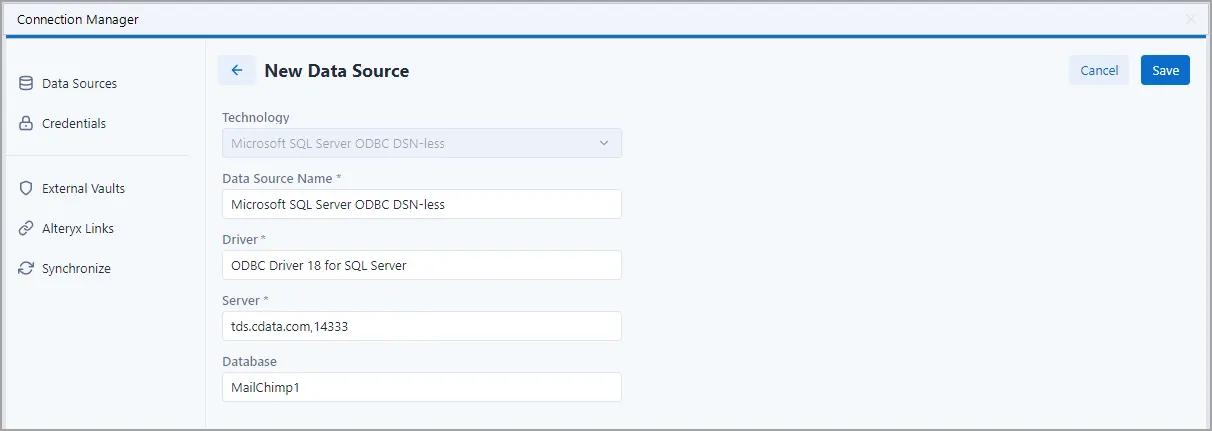
-
In the New Data Source dialog, enter the following information:
- Data Source Name: Microsoft SQL Server ODBC DSN-less.
- Driver: select ODBC Driver 18 for SQL Server from the drop-down list.
- Server: tds.cdata.com,14333
- Database: enter the Connection Name of the CData Connect Cloud data source you want to connect to (for example, Xero1).
- Click Save. Then click Connect Credential.
-
In Connections, enter the following:
- Authentication Method: select Username and password.
- Credential: select Create New Credential.
- Credential Name: enter a name to identify the credential.
- Username: enter your CData Connect Cloud username. This is displayed in the top-right corner of the CData Connect Cloud interface. For example, [email protected].
- Password: enter the PAT you generated on the Settings page.
- Click Test Connection. If successful, click Create and link.
- Connect with your credentials.
-
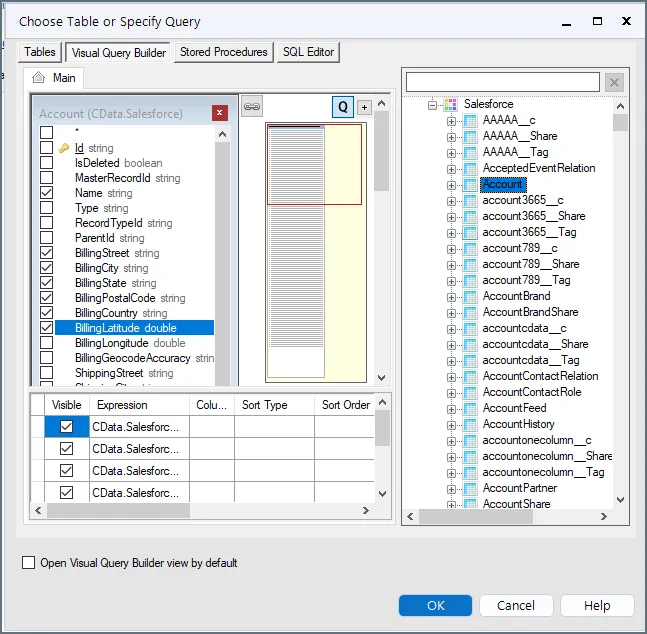
In the wizard that opens, drag and drop the table to be queried in the Query Builder box. Select the fields by checking the boxes that you want to include in your query. Where possible, the complex queries generated by the filters and aggregations will be pushed down to your data source, while any unsupported operations (which can include SQL functions and JOIN operations) will be managed client-side by the CData SQL engine embedded in the connector.
-
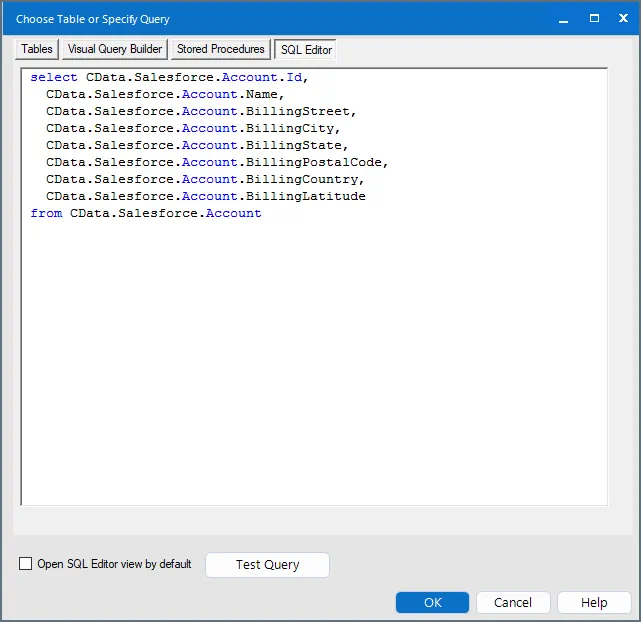
To further customize the dataset, you can open the SQL Editor and modify the query manually, adding clauses, aggregations, and other operations to ensure that you are retrieving exactly the data desired.
-
With the query defined, you are ready to work with your data in Alteryx Designer.
Get CData Connect Cloud
To get live data access to 100+ SaaS, Big Data, and NoSQL sources directly from your SQL Server database, try CData Connect Cloud today!